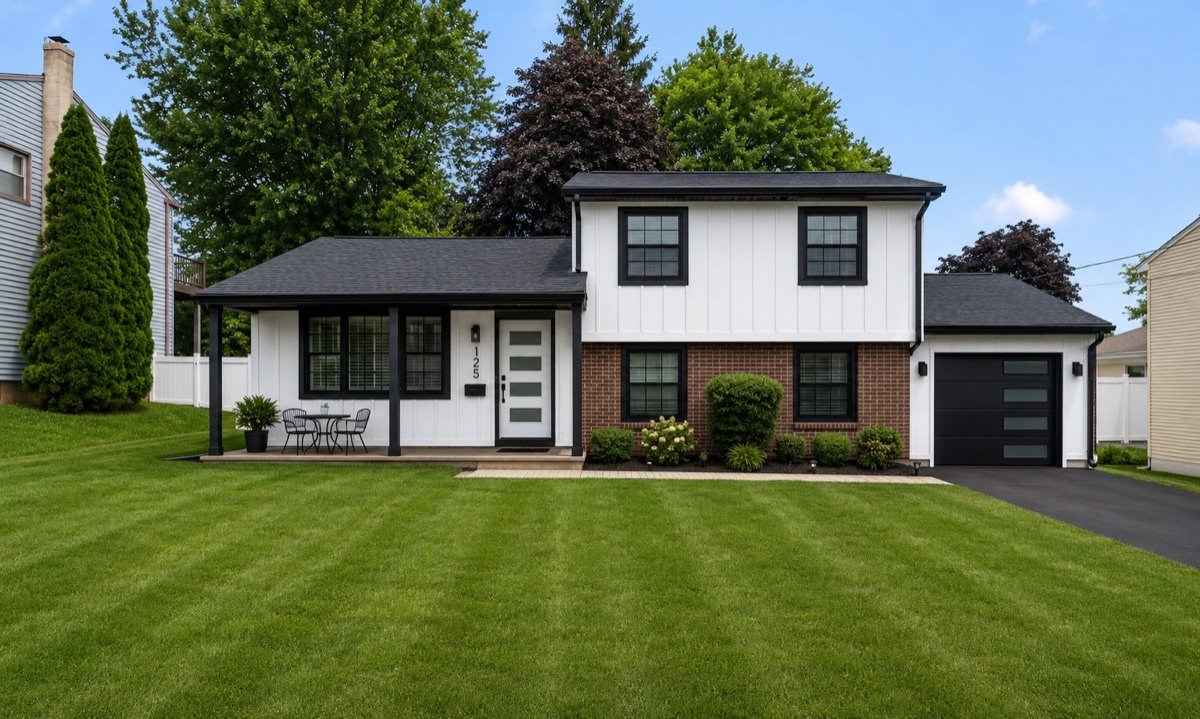
Siding is the part of the wall you see, but it isn’t what keeps the house dry. Behind it sits a weather-resistive barrier, and around every window, door, corner and roofline is a set of trim and flashing parts that steer water back outside.
This guide explains each of those parts: what it is, where it goes, what it’s made of and what goes wrong when it’s skipped. It covers the siding systems we install: vinyl, James Hardie fiber cement, board and batten, and composite and PVC.
Code references are to the International Residential Code (IRC); manufacturer details come from the Vinyl Siding Institute and James Hardie’s installation instructions. Your town’s adopted code and the specific product’s instructions always govern. For the roof side of the house, see Parts of a Roof, Explained.
Key takeaways
- Siding sheds most of the rain, but the weather-resistive barrier (house wrap) behind it is the real waterproof layer.
- Every opening is flashed shingle-style: sill first, then the sides, then the head, with the house wrap lapped over the top.
- Vinyl has to move: nail in the center of the slot, leave about 1/32 inch under the head and 1/4 inch in J-channel.
- Fiber cement needs clearances (6 inches to grade, 2 inches to roofs, decks and walkways per James Hardie) and flashing behind butt joints.
- A kick-out at the bottom of every roof-to-wall joint keeps roof water out of the wall.
Quick Reference
| Part | What it is | Purpose |
|---|---|---|
| House wrap (WRB) | House wrap is the weather-resistive barrier (WRB) installed over the wall sheathing, under the siding. | Stops water that gets behind the siding from reaching the wall, while still letting the wall dry. |
| Window & door flashing tape | Window and door flashing is the layered tape, membrane and metal that seals the rough opening around a window or door and ties it into the house wrap, so any water that reaches the opening is guided back outside instead of into the wall. | Seals the rough opening around a window or door and sends any water that reaches it back outside. |
| Drip cap / Z-flashing | A drip cap (also called head flashing, or Z-flashing for its shape) is a bent metal strip installed over the top of a window, door or horizontal trim board. | Throws water off the top of windows, doors and trim so it can’t run behind them. |
| Starter strip | A siding starter strip is the strip fastened level along the bottom of the wall that the first course of siding locks into (vinyl) or sits on (fiber cement and wood), so the first row starts straight and at the right angle. | Starts the first course of siding level, locked in and at the right angle. |
| J-channel | J-channel is a vinyl or metal trim channel, shaped like the letter J in cross-section, that receives and hides the cut ends of vinyl siding around windows, doors, rooflines and soffits while leaving room for the siding to expand. | Hides the cut ends of vinyl siding around openings and edges while leaving room for the siding to expand. |
| Corner posts & boards | Corner posts (vinyl) and corner boards (fiber cement, PVC or wood trim) are the vertical trim pieces at the outside and inside corners of a house that the siding courses end into. | Finishes the corners of the house and gives the siding a clean edge to end into. |
| Window & door trim | Window and door trim (casing) is the flat border around a window or door that the siding butts into. | Frames windows and doors and covers the joint between the window and the wall. |
| Frieze board | A frieze board is a horizontal trim board installed at the top of the wall, just under the soffit. | Caps the top of the wall and gives a finished transition between the siding and the soffit. |
| Undersill / finish trim | Undersill trim (also called finish trim or utility trim) is a vinyl accessory that holds the cut top edge of a siding panel in place under a window sill or at the top of a wall, where the panel’s nailing hem has been cut off. | Holds the cut top edge of a siding panel tight where its nailing hem has been cut off. |
| Mounting blocks | A mounting block is a raised, flashed base that lets a light fixture, outlet, faucet, dryer vent or meter mount flat against the siding instead of being screwed through it. | Gives lights, outlets, faucets and vents a flat, flashed base so they never have to be screwed through the siding. |
| Butt-joint flashing | Butt-joint flashing is a small piece of flashing slipped behind the joint where two lengths of fiber cement lap siding meet end to end, so water that gets into the joint drains down its face instead of soaking the wall. | Keeps water that gets into a joint between fiber cement boards from soaking the wall behind it. |
| Roof-to-wall flashing & kick-outs | Where a roof meets a sided wall, roof-to-wall flashing (step flashing woven into the shingles) runs up the wall behind the house wrap, and a kick-out at the bottom turns the water into the gutter so it can’t pour behind the siding. | Keeps roof water from getting behind the siding where a roof meets a wall. |
| Clearances & expansion gaps | Siding clearances are the small, deliberate gaps a manufacturer requires between the siding and the ground, roofs, decks and other surfaces, plus the expansion gaps vinyl needs to move with the temperature. | Keep siding from wicking up water from the ground, roofs and decks, and give vinyl room to expand and contract. |
| Soffit & fascia | The fascia is the flat board along the roof edge that carries the gutters; the soffit is the panel that closes the underside of the roof overhang. | The fascia closes the roof edge and carries the gutters; the soffit closes the underside of the overhang and, when vented, lets air into the attic. |
Part 1 · Behind the siding
The layers that actually keep water out of the wall.
House Wrap (Weather-Resistive Barrier)
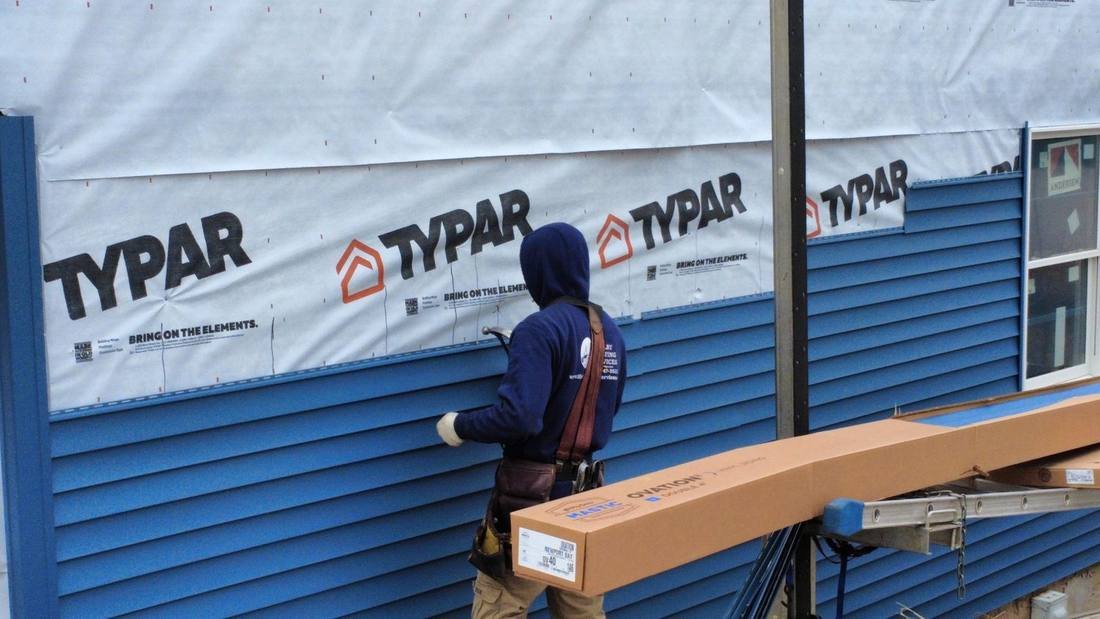
Also called: weather-resistive barrier, WRB, building wrap, Tyvek, TyparHouse wrap is the weather-resistive barrier (WRB) installed over the wall sheathing, under the siding. It stops liquid water that gets behind the siding from reaching the wood, while still letting water vapor escape out of the wall so it can dry.
PurposeStops water that gets behind the siding from reaching the wall, while still letting the wall dry.
- Why it matters
- No siding is waterproof. Vinyl, fiber cement and composite all shed most of the rain, but some always gets behind them. The barrier underneath is what keeps the wall dry.
- Code
- IRC R703.2 requires a water-resistive barrier behind exterior siding: one layer of No. 15 asphalt felt or another approved barrier, lapped at least 2 inches at horizontal joints (upper over lower) and 6 inches at vertical joints.
- Common products
- Spun-bonded polyolefin wraps such as DuPont Tyvek and Typar; asphalt felt and Grade D building paper; drainable wraps with a textured or grooved surface.
- Partner parts
- The wrap only works when it’s tied into window, door and roof flashing so every lap sheds water outward.
How it’s installed
- The wall sheathing is checked and any damaged sections are repaired.
- The wrap is rolled on from the bottom of the wall up, so each upper course laps over the one below.
- Vertical seams overlap and are taped with the manufacturer’s tape; the wrap is fastened with cap nails or cap staples.
- At windows and doors, the wrap is cut and folded so it tucks under the sill flashing and laps over the head flashing.
What goes wrong
- Wrap installed upside down (lower course over upper), so it funnels water behind itself.
- Torn wrap left unrepaired, or large gaps around windows.
- Wrap laid over the head flashing at a window instead of over the top of it.
A weather-resistant barrier is installed over the structure on every siding system we install, from vinyl to fiber cement and composite, as the primary defense against moisture behind the panels. Tyvek is our standard house wrap.
Window and Door Flashing
Also called: flashing tape, flexible flashing, sill panWindow and door flashing is the layered tape, membrane and metal that seals the rough opening around a window or door and ties it into the house wrap, so any water that reaches the opening is guided back outside instead of into the wall.
PurposeSeals the rough opening around a window or door and sends any water that reaches it back outside.
- Code
- IRC R703.4 requires corrosion-resistant flashing, applied shingle-fashion, at exterior window and door openings, above projecting trim and at wall-and-roof intersections.
- Flashing tape
- Self-adhered tapes, usually butyl, acrylic or rubberized-asphalt based, sealed over the window’s nailing flange and the house wrap. The tape must be compatible with the wrap and the window.
- Sill pans
- Pre-formed or tape-built pans under doors and windows catch water at the bottom of the opening and send it out.
- The order
- Bottom first, then the sides, then the top, so every layer laps over the one below like shingles.
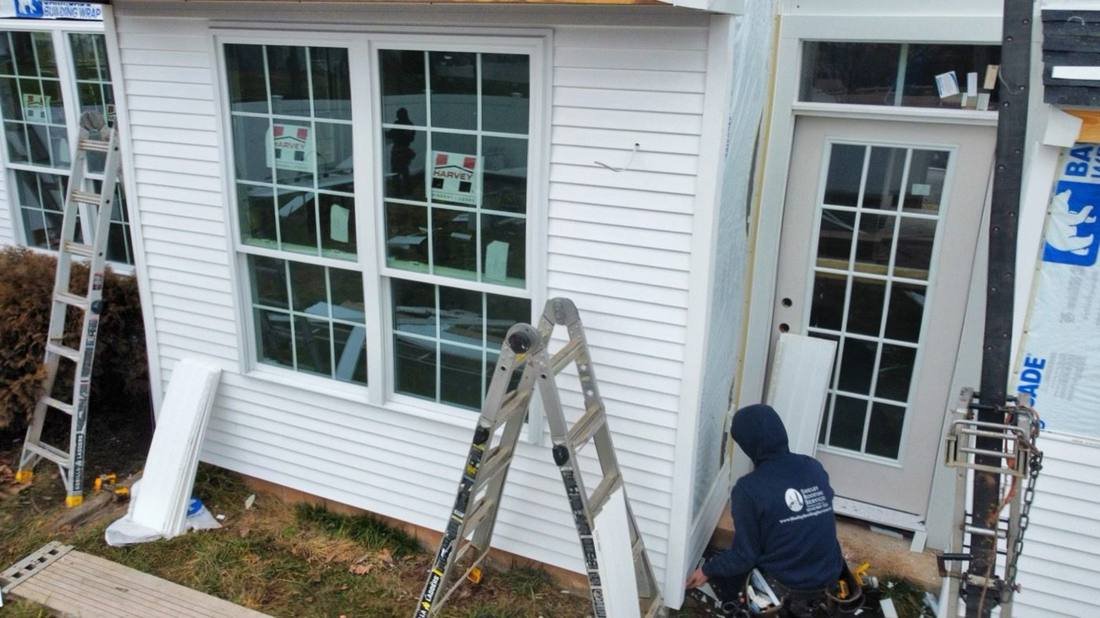
How it’s installed
- Sill: the bottom of the opening is flashed first, often with a sill pan, turned up at the corners.
- Window set: the window goes in and its nailing flange is fastened.
- Jambs: tape is run up both sides, lapping over the sill flashing.
- Head: tape goes across the top, over the side tapes; the house wrap flap is then folded down over the head tape and taped.
- A drip cap goes over the head trim once the siding is installed.
What goes wrong
- Tape installed top-down, so the upper layer sits under the lower one and funnels water in.
- The bottom flange of the window taped shut, trapping any water that gets in.
- House wrap folded over the sill instead of tucked under the sill flashing.
Flashing is installed at windows, doors, roof-to-wall areas and wall transitions on our siding projects, before the siding goes on.
Drip Cap (Head Flashing)
Also called: head flashing, Z-flashing, cap flashingA drip cap (also called head flashing, or Z-flashing for its shape) is a bent metal strip installed over the top of a window, door or horizontal trim board. It throws water out past the face of the trim instead of letting it run behind it.
PurposeThrows water off the top of windows, doors and trim so it can’t run behind them.
- Where it goes
- Over every window and door head trim, over horizontal trim bands and belly bands, and at horizontal joints between two siding materials.
- Code
- IRC R703.4 calls for flashing continuously above all projecting wood trim.
- Shape
- The back leg runs up behind the house wrap; the front lip covers the trim with a small kick so water drips clear.
- Materials
- Prefinished aluminum, galvanized steel or PVC; copper on copper-detailed homes.
What goes wrong
- No drip cap over wood or composite trim, so the top of the trim rots first.
- The back leg installed over the house wrap instead of under it.
- Caulk used in place of flashing at a horizontal joint.
Weather Barrier Types and Flashing Tape
Behind every siding system is a weather-resistive barrier. These are the main types, and the tapes and flashings that tie them together.
| Barrier type | What it is | Good to know |
|---|---|---|
| House wrap | A spun-bonded or woven polyolefin sheet (for example Tyvek or Typar). Housewraps are tested to ASTM E2556. | Lightweight and vapor-permeable. Lapped shingle-fashion and taped at seams. |
| Asphalt felt | No. 15 asphalt felt (ASTM D226 Type I), the barrier named in IRC R703.2. | Traditional, still used behind some siding and trim. |
| Grade D building paper | Asphalt-saturated kraft paper. | Common behind stucco, often in two layers. |
| Drainable house wrap | A wrap with a textured, crinkled or grooved surface. | Creates small channels so water behind the siding drains down and out faster. |
| Rainscreen | A real air gap behind the siding, made with furring strips or a drainage mat. | Lets the wall and the back of the siding dry; used behind fiber cement, wood and composite on demanding walls. |
| Integrated or fluid-applied | Sheathing with a factory-applied barrier and taped seams, or a barrier sprayed or rolled on. | Mostly in new construction. |
Flashing tape
Self-adhered tape, butyl, acrylic or rubberized-asphalt based, that seals window and door flanges, wrap seams and penetrations.
- Applied bottom to top, so upper pieces lap over lower
- Rolled firmly for full adhesion
- Must be compatible with the wrap, window and any sealant it touches
Seam tape & cap fasteners
Wrap manufacturers specify their own seam tape and plastic-cap nails or staples, which hold the sheet without tearing it.
- Vertical seams overlapped and taped
- Horizontal laps shingled, upper over lower
Sill pans
A pan under a door or window that catches water at the bottom of the opening and directs it outward.
- Pre-formed or built from flexible flashing
- Back dam and turned-up ends
Metal flashings
Drip caps over trim, Z-flashing at horizontal joints between materials, step flashing and kick-outs at roof-to-wall joints, and butt-joint flashing on fiber cement.
- Back legs always tuck behind the wrap above
Tyvek is our standard house wrap, lapped and taped so every seam sheds water outward, and tied into the window, door and roof-to-wall flashing before the siding goes on.
Part 2 · Trim & accessories
The pieces that start, stop and finish the siding.
Siding Starter Strip
Also called: starter courseA siding starter strip is the strip fastened level along the bottom of the wall that the first course of siding locks into (vinyl) or sits on (fiber cement and wood), so the first row starts straight and at the right angle.
PurposeStarts the first course of siding level, locked in and at the right angle.
- Vinyl
- A metal or vinyl starter strip, fastened to a level chalk line. The bottom lock of the first panel hooks into it.
- Fiber cement
- A narrow strip ripped from the siding (or a starter product) under the bottom edge of the first board, so it angles out like the courses above it.
- Why it matters
- If the starter isn’t level, every course above it runs out of level and the error shows at every corner and window.
Starter strips are installed at the base of the wall so the siding begins level and stays aligned across the entire elevation.
J-Channel
Also called: J-trim, receiving channelJ-channel is a vinyl or metal trim channel, shaped like the letter J in cross-section, that receives and hides the cut ends of vinyl siding around windows, doors, rooflines and soffits while leaving room for the siding to expand.
PurposeHides the cut ends of vinyl siding around openings and edges while leaving room for the siding to expand.
- Where it goes
- Around windows and doors, under soffits, along rooflines and at the edges of gables.
- Expansion gap
- The Vinyl Siding Institute calls for 1/4 inch of clearance inside receiving channels for expansion, increased to 3/8 inch when installing below 40°F.
- Fastening
- Accessories like J-channel are fastened every 8 to 12 inches, never nailed tight.
- At window heads
- The top J-channel is notched and its tabs bent down into the side channels, so water is shed over them, not into them.
What goes wrong
- Siding jammed tight into the channel, so it buckles on the first hot day.
- Head J-channel butted to the side channels without the flap, so water drains behind them.
- J-channel along a roofline set right on the shingles.
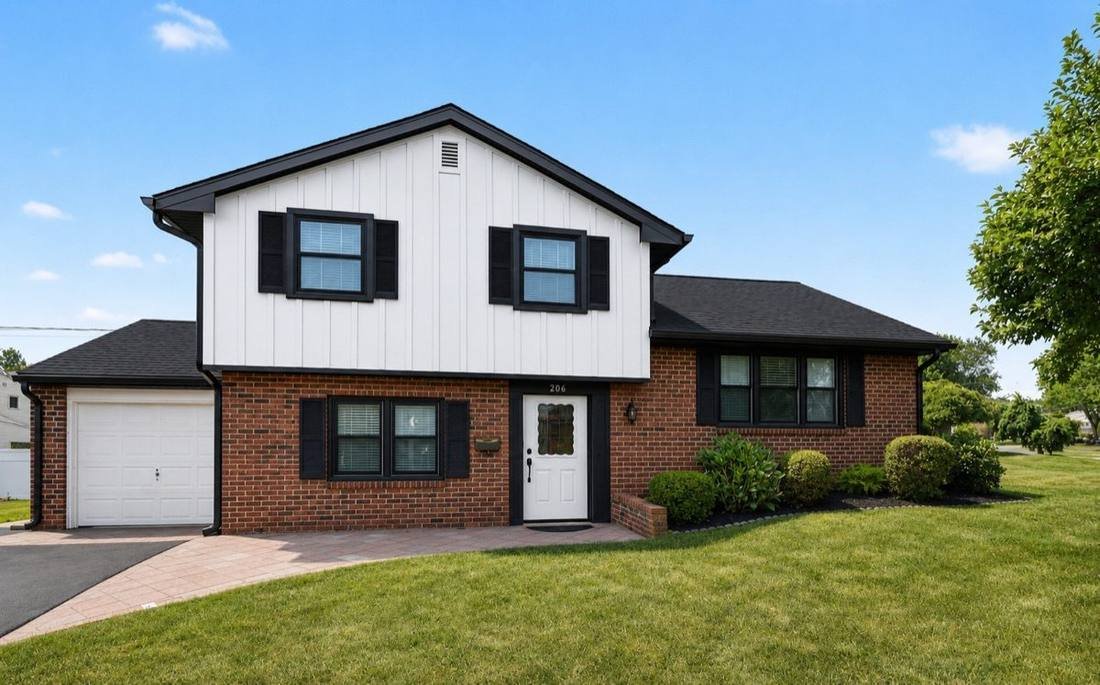
J-channels, corner posts and window and door trim are installed to direct water away from openings and allow proper thermal expansion on every vinyl siding system we install.
Corner Posts and Corner Boards
Also called: outside corner post, inside corner, corner trimCorner posts (vinyl) and corner boards (fiber cement, PVC or wood trim) are the vertical trim pieces at the outside and inside corners of a house that the siding courses end into.
PurposeFinishes the corners of the house and gives the siding a clean edge to end into.
- Outside corners
- Vinyl uses a one-piece outside corner post with channels on both sides. Fiber cement and composite use two trim boards joined at the corner.
- Inside corners
- An inside corner post, J-channel or a single trim board, depending on the siding.
- Behind the corner
- The house wrap is wrapped around the corner, not cut at it, so there’s no seam where two walls meet.
Window and Door Trim
Also called: casing, brick mould, window surroundWindow and door trim (casing) is the flat border around a window or door that the siding butts into. It frames the opening and covers the joint between the window and the wall.
PurposeFrames windows and doors and covers the joint between the window and the wall.
- Materials
- PVC trim, fiber cement trim, aluminum-wrapped wood (bending coil stock over existing trim) and vinyl window surrounds.
- Gaps
- Siding stops a small, even distance from the trim, sized to the manufacturer’s instructions, and the joint is sealed where the instructions call for it.
- Top edge
- A drip cap goes over the head trim (see drip cap).
What goes wrong
- Wood trim left unflashed and unprimed on its back and ends.
- Siding butted tight to trim with no room to move.
Frieze Board
Also called: frieze trimA frieze board is a horizontal trim board installed at the top of the wall, just under the soffit. It caps the top course of siding and gives a finished transition between the wall and the eaves.
PurposeCaps the top of the wall and gives a finished transition between the siding and the soffit.
- Where it goes
- Along the top of each wall under the roof overhang, and sometimes along gable rakes.
- Materials
- Fiber cement, PVC or wood trim on lap siding; on vinyl, the top course usually finishes into J-channel or undersill trim instead.
Undersill Trim
Also called: finish trim, utility trimUndersill trim (also called finish trim or utility trim) is a vinyl accessory that holds the cut top edge of a siding panel in place under a window sill or at the top of a wall, where the panel’s nailing hem has been cut off.
PurposeHolds the cut top edge of a siding panel tight where its nailing hem has been cut off.
- How it holds
- The cut panel is punched with a snap-lock tool, which raises small tabs that lock into the trim.
- Where it goes
- Under windows, under the soffit or frieze, and anywhere a top course has to be cut lengthwise.
Mounting Blocks
Also called: split block, light block, utility block, vent blockA mounting block is a raised, flashed base that lets a light fixture, outlet, faucet, dryer vent or meter mount flat against the siding instead of being screwed through it.
PurposeGives lights, outlets, faucets and vents a flat, flashed base so they never have to be screwed through the siding.
- Types
- Light blocks, recessed and surface-mount electrical blocks, split blocks for existing pipes and wires, hose-bib and utility blocks, and dryer and exhaust vent blocks.
- Why it matters
- Vinyl has to move. A fixture screwed straight over vinyl pins it in place, cracks it and leaves an unflashed hole in the wall.
- How it’s sealed
- The block is flashed into the house wrap; the siding is trimmed around it with its expansion gap, and the block’s trim ring covers the cut.
Our crews use mounting blocks on our siding projects, so lights, outlets, faucets and vents mount on a proper base instead of being screwed through the siding.
Part 3 · Water management details
Small details that decide whether a wall stays dry.
Butt-Joint Flashing
Also called: joint flashingButt-joint flashing is a small piece of flashing slipped behind the joint where two lengths of fiber cement lap siding meet end to end, so water that gets into the joint drains down its face instead of soaking the wall.
PurposeKeeps water that gets into a joint between fiber cement boards from soaking the wall behind it.
- Fiber cement
- Joint flashing behind each butt joint is the method James Hardie recommends; factory edges are butted together in moderate contact.
- Vinyl
- Vinyl panels overlap at their ends instead (about 1 inch, per the Vinyl Siding Institute), so they don’t need joint flashing.
- Layout
- Joints are staggered from course to course so they never line up in a vertical column.
From Vinyl to Hardie Board
Miguel introduces a project where the roof is being replaced and the home’s vinyl siding is coming off for new James Hardie fiber cement. Fiber cement is rigid and doesn’t move like vinyl, so its trim, joints, flashing and clearances have to be planned before the first board goes up.
What goes wrong
- Butt joints left unflashed, so water reaches the wrap at every seam.
- Joints stacked in a straight line up the wall.
Fiber cement does not flex like vinyl, so our crews plan the layout before installation and flash windows, doors, roof-to-wall areas and wall transitions. We are a James Hardie Approved Installer and HardieZone Certified.
Roof-to-Wall Flashing and Kick-Outs
Also called: step flashing, kick-out flashing, diverterWhere a roof meets a sided wall, roof-to-wall flashing (step flashing woven into the shingles) runs up the wall behind the house wrap, and a kick-out at the bottom turns the water into the gutter so it can’t pour behind the siding.
PurposeKeeps roof water from getting behind the siding where a roof meets a wall.
- Code
- IRC R905.2.8.3: where siding covers the wall, the vertical leg of the roof flashing runs continuously under the siding. IRC R903.2.1 requires a diverter where a roof eave meets a sidewall.
- Clearance
- James Hardie’s instructions call for a 2-inch gap between the roof and the bottom of the siding and trim, so the siding can’t wick water from the roof.
- Re-siding tip
- Re-siding is the best time to fix missing kick-outs and rusted step flashing, because the wall is open.
The roof side of this detail is covered in our roof guide: step flashing and kick-out flashing.
What goes wrong
- No kick-out at the bottom of the roofline, the classic cause of rot under a roof edge.
- Siding run down onto the shingles with no gap.
- House wrap tucked behind the step flashing instead of lapped over it.
Wherever a roof edge ends against a wall that keeps going below it, our crews install a kick-out, so roof water goes into the gutter instead of behind the siding.
Siding Clearances and Expansion Gaps
Also called: clearance to grade, expansion allowanceSiding clearances are the small, deliberate gaps a manufacturer requires between the siding and the ground, roofs, decks and other surfaces, plus the expansion gaps vinyl needs to move with the temperature.
PurposeKeep siding from wicking up water from the ground, roofs and decks, and give vinyl room to expand and contract.
| Detail | Typical requirement | Source |
|---|---|---|
| Fiber cement to finished grade | 6 inches (follow local code) | James Hardie |
| Fiber cement to roofing | 2 inches | James Hardie |
| Fiber cement to decks, patios, steps, walkways | 2 inches | James Hardie |
| Vinyl in J-channel and receiving channels | 1/4 inch; 3/8 inch below 40°F | Vinyl Siding Institute |
| Vinyl nail heads | Center of the slot, about 1/32 inch (a dime’s thickness) loose | Vinyl Siding Institute |
| Vinyl nail penetration | At least 1-1/4 inches into a nailable surface | Vinyl Siding Institute |
| Vinyl panel end laps | About 1 inch | Vinyl Siding Institute |
Always follow the specific product’s current installation instructions, which can differ from these typical values.
What goes wrong
- Fiber cement run down to the soil or a patio, where it wicks water and the finish fails.
- Vinyl nailed tight, which makes it buckle and wave in summer heat.
Our vinyl installs include the fastening and expansion allowances the panels depend on, and every siding project starts with layout planning so clearances and lines are right before the first panel goes up.
Part 4 · At the roofline
Where the wall meets the roof.
Soffit and Fascia
Also called: eaves, roof overhang trimThe fascia is the flat board along the roof edge that covers the ends of the rafters and carries the gutters. The soffit is the panel that closes the underside of the roof overhang; when it’s vented, it’s where fresh air enters the attic.
PurposeThe fascia closes the roof edge and carries the gutters; the soffit closes the underside of the overhang and, when vented, lets air into the attic.
- Materials
- Soffit: aluminum or vinyl (vented or solid), fiber cement, PVC or wood. Fascia: wood, cellular PVC or composite trim, fiber cement trim, or wood covered with aluminum fascia wrap (coil stock bent over the board). More in our roof guide’s fascia board section.
- Gutters
- The gutters hang on the fascia; every part of the gutter system is explained in Parts of a Gutter System.
- Ventilation
- Vented soffit is the intake half of a balanced attic system. A ridge vent can’t work without it (see roof ventilation).
- Drip edge
- The roof’s drip edge laps over the fascia so water lands in the gutter, not behind it.
What goes wrong
- Solid soffit installed where the attic depends on soffit intake.
- Aluminum wrapped over rotted fascia instead of replacing the wood.
Questions & Answers
Straight answers to the siding questions homeowners ask us most.
What is house wrap, and is it required?
House wrap is the weather-resistive barrier installed over the wall sheathing under the siding. It blocks water that gets behind the siding while letting the wall dry. The International Residential Code (R703.2) requires a water-resistive barrier, such as No. 15 felt or an approved house wrap, behind exterior siding. Shelby Roofing Services uses Tyvek as its standard house wrap.
What is J-channel on siding?
J-channel is a vinyl or metal trim channel shaped like a J that receives the cut ends of vinyl siding around windows, doors, rooflines and soffits. It hides the cuts and leaves room for the siding to expand, typically 1/4 inch per the Vinyl Siding Institute.
What is the difference between J-channel and a corner post?
A corner post is a one-piece vertical trim with channels on two sides that finishes an outside or inside corner of the house. J-channel is a single channel used around openings and along edges. Both receive the ends of the siding and allow it to expand.
What is a frieze board?
A frieze board is a horizontal trim board at the top of the wall, just under the soffit, that caps the top course of siding and gives a finished transition to the roof overhang.
What is a mounting block on siding?
A mounting block is a raised, flashed base for a light, outlet, faucet, dryer vent or meter, so the fixture mounts flat on the block instead of being screwed through the siding. It keeps vinyl free to expand and seals the penetration. Our crews use mounting blocks on our siding projects.
What is a drip cap or Z-flashing?
A drip cap is a bent metal flashing installed over the top of a window, door or horizontal trim board. Its back leg tucks behind the house wrap and its front lip throws water clear of the trim. The IRC (R703.4) calls for flashing above projecting trim.
Why shouldn’t vinyl siding be nailed tight?
Vinyl expands and contracts with the temperature. The Vinyl Siding Institute calls for nailing in the center of each slot and leaving about 1/32 inch, roughly the thickness of a dime, under the nail head so the panel can slide. Nailed tight, it buckles and waves.
How far should siding be from the ground and the roof?
For fiber cement, James Hardie’s instructions call for about 6 inches above finished grade (or as local code requires), 2 inches above a roof, and 2 inches above decks, patios, steps and walkways.
Do fiber cement butt joints need flashing?
Yes. James Hardie recommends joint flashing behind each butt joint, with factory edges butted together in moderate contact. Vinyl panels overlap at their ends instead, so they don’t need joint flashing.
What is kick-out flashing on siding?
Kick-out flashing is an angled piece at the bottom of a roof-to-wall joint that turns roof water into the gutter instead of behind the siding. The IRC (R903.2.1) requires one where a roof eave meets a sidewall, and re-siding is the best time to add a missing one. Shelby Roofing Services installs a kick-out wherever a roof edge ends against a wall.
What are soffit and fascia?
Fascia is the flat board along the roof edge that covers the ends of the rafters and carries the gutters; the drip edge laps over it. Soffit is the panel under the roof overhang; when vented, it brings fresh air into the attic as the intake half of the roof ventilation system.
What is flashing tape used for?
Flashing tape is a self-adhered tape, usually butyl, acrylic or rubberized-asphalt based, that seals window and door flanges, house wrap seams and penetrations. It is applied bottom first, then sides, then top, so every piece laps over the one below.
Keep Exploring
Planning new siding, or seeing soft spots, stains or waves in your old siding? A free inspection shows you what’s happening behind it.